
We currently don't ship our artwork framed. We don't ship framed artwork for a couple of reasons. Firstly is cost. We ship worldwide and offer a free standard shipping option to anywhere in the world. We can do this because our artwork is relatively lightweight, and because it's also fairly flat we can slip it into either a hardbacked envelope or a flat box. For us to ship you a framed piece of artwork would cost far in excess of the value of the frame - purely because of the significantly increased size and weight.
Secondly is the increased possibility of damage. Our artwork very rarely gets damaged in shipping, maybe one out of every 200 or so orders gets damaged in transit, and we always ship replacements free of charge. If we ship framed artwork there is a much greater chance of damage because of the glass (or sometimes Plexiglas) in the frame being cracked, or the corners of the frame getting dented or bashed. Coupled with the additional expense of shipping framed items in the first place we decided it just wasn't an option that made sense.
So that brings us to framing.
We decided that if we weren't going to ship framed artwork, the next best option would be to provide customers with easy framing options wherever they live.
We sell 8x10 inch and A4 sizes of all our designs to suit buyers worldwide. For those unfamiliar with A4 it is a common international paper size comparable to 8x10 inch. No matter which size you select the actual laser cut wood and printed elements of the design are identical in size. A4 is slightly longer than 8x10" so the design will simply have a little more white space around the edge.
You can of course use any frame which is sized for our artwork, but to try and keep things simple, we usually use IKEA frames for our product photos. We do this because the same frames can be found no matter where you live on the planet! Specifically we tend to use the black RIBBA frame from IKEA, its simple design suits our artwork - but that's not to say they won't look great in other frames!
If you order our artwork in 8x10 size then you will want to buy the 12x16" RIBBA frame, with the mat left in it will fit our 8x10 sized artwork perfectly.
If you order our artwork in A4 size then you will want to buy the 30x40 cm RIBBA frame, with the mat left in it will fit our A4 sized artwork perfectly.
Your purchasing options may be different depending on where you live and your country's IKEA stores. For example, North American stores offer the 12x16" size, while European stores offer the 30x40 cm size.
So now let's assume you've got your frame.
The steps outlined below are for the RIBBA frame mentioned above, but they should be similar for all frames from anywhere!
We recommend you do this on a clean flat and level surface - mainly because it just makes it a hell of a lot easier than trying to do it on your lap or on a lumpy duvet!
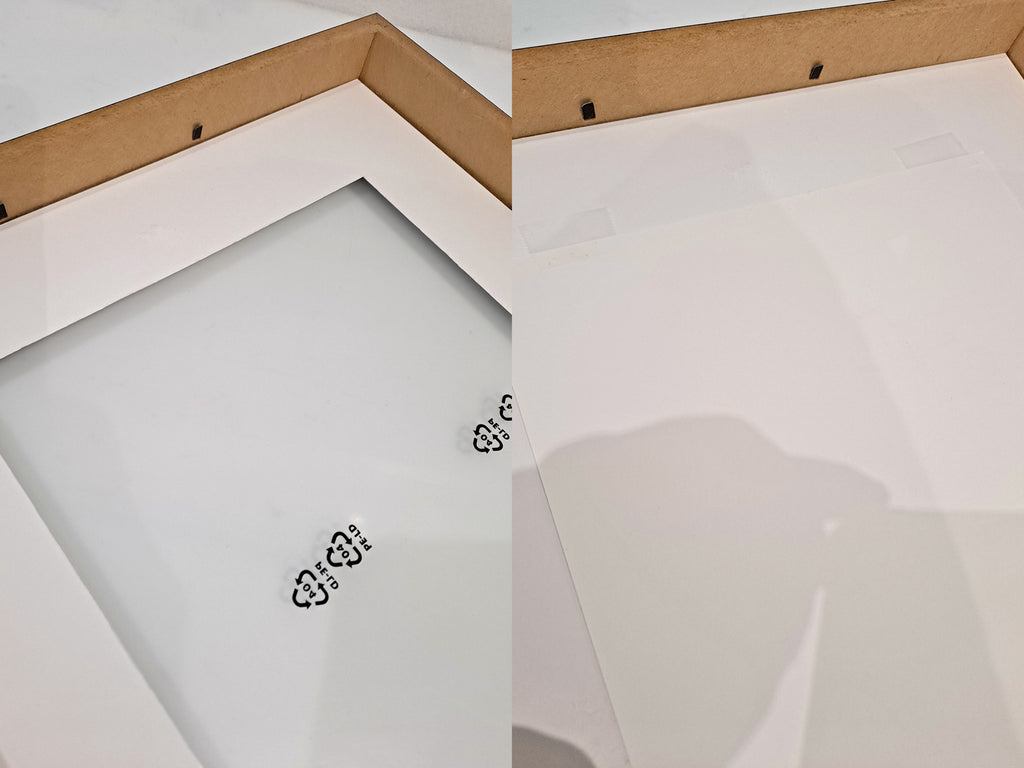
First thing you need to do is prize up the metal clips holding the wood backboard in place. You can either use your fingernail (careful!) or something like a flat-edged screwdriver or a butter knife. Once they are all bent 90 degrees up you can lift out the wooden backboard.

Underneath this is the mat (the border which goes around the picture). Lift this out and set it aside.
Underneath the mat is the glass (or Plexiglas) of the frame.
We usually recommend removing the glass entirely, simply because when hidden behind glass the three-dimensional nature of our artwork is harder to see. Also, unless there is only one layer of wood on your chosen design, it may not fit behind the glass when you reassemble it.
If you want to have it behind glass you will need a 'box frame' this is a deeper style of frame which has more space between the artwork and the glass.
So anyway, now you have the glass out you can put the mat back in.
Now you can take the artwork and carefully line it up with the opening in the mat, the mat opening is usually a 1/4 inch (3 - 4 mm) smaller than the artwork, allowing you a little bit of wiggle room on all sides. Once you have it lined up evenly all around the edge you can add a few strips of tape (any tape will do, clear cellotape or white masking tape) around the edge making sure it is stuck to both the back of the artwork and the mat.
Now you can put the wood backboard back in and fold the metal clips back down. Make sure you put it in so the picture hanging brackets are aligned correctly so it will hang on the picture hook the right way up!

That's it!
Now you just need to get a hook in the wall...